
Posted on 12/10/2007 11:08:05 PM PST by carbonarc
Carbonarcs Excellent Kerosene Heater Owners Guide
The K1 you see with red dye is intended to discourage truckers from using K1 to reduce their fuel tax by diluting the diesel fuel....[lots more]
The K1 you see with red dye is intended to discourage truckers from using K1 to reduce their fuel tax by diluting the diesel fuel. The dye is easily visible in the diesel fuel tank if the truck is inspected. The bad part is this dye will degrade your kerosene heaters performance and wick life. Shop around. Some places have K1 pumps with very short hoses and are allowed to sell undyed K1.
I've been using kerosene heaters for 25 years. I bought my first, a Kerosun Omni 85, in 1982. I still use this heater when I need reliable heat during power outages. Kerosene prices are so high it no longer competes with electricity on cost, especially since the advent of ceramic element heaters. But before it went over $2.50 a gallon it was the way to go and I used kerosene exclusively for all my heating. My Omni 85 has around 35000 hours of burn time on it and still runs like new. It can be throttled from around 9000 BTU up to 13000 BTU at full trim. I replaced the wick extender in 1999, and I replace the mica windows every 5 years or so. I put in a new wick every second or third winter, when needed. I bought a Omni 105 [23000 BTU] in 1998 when I moved to a bigger house, but it is rarely used in Southern winters. I also bought an Omni 15 recently [5000 BTU] when it became available at a local pawn shop.
All one needs to do to safely use kerosene heaters is to read the instruction manual, prepare a place to run it, and use some common sense.
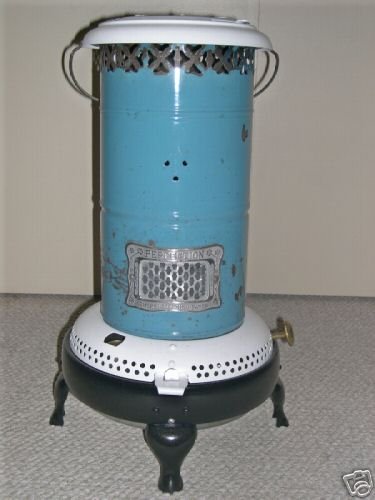
Heater recommendations: only buy round "convective" type, "white flame" kerosene heaters. The "radiant" types do not burn near as clean as the convective. If you can find a clean serviceable kerosun or toyostove model with the "white clean" burner you will be much safer as well as odor free. This guide is strictly for round convective white flame heaters, as I have no experience with radiant types, other than smelling them.
New heaters are quite simple to put together if you follow instructions. Usually all you need to do is carefully unpack it, remove any shipping blocks, and install the cabinet.
-----> Read the owners manual carefully <-----
Use only water clear K-1 kerosene.
Do not buy kerosene in a container that has been used for anything else.
New blue 5 gallon fuel "cans" are the way to go. I have three. They are hard to find when the ice storm hits and going to buy fuel every day can be unpleasant.
Never put anything in them but K1 and K1 approved additive.
Kerosene heaters will blaze up wildly if any other fuel is present, even in small amounts.
Use a alcohol based "water getter" with your fuel to keep the wick dry and prevent rust in the fuel tank. This is usually sold where K1 is, but not always.
Here's an example of this additive available on the web:
www.amazon.com/Scented-Kerosene-Fuel-Additive-oz/dp/B0002YT1OA
I know it says scented, but you will only smell it on startup and shutdown. Thankfully.
-----> Never use an old gas can for your kerosene can<-----
Kerosene does not store well for long periods without preservatives. If your fuel is more than a few months old, don't use it. It will contaminate the wick and the heater will emit odor.
To be safe, only fuel your heater outside, using a squeeze type suction pump. Allow the heater to cool below ignition temperature before fueling it. You can fuel a warm heater but never fuel a hot one.
Once you become expert at it, you may consider fueling it inside. If you do, prepare a fueling station for it that can contain any spills, and keep a shop rag and a bucket of ---> dry <--- fire extinguishing media nearby.
On new heaters let the wick soak for 45 mins before lighting the heater. Once you have been using the heater, you can light it as soon as it is safe to do so after fueling, I.E. the fuel can and fuel tank is capped, any droplets spilled have been wiped up, and no fuel vapors are present.
Place the heater where it will be running. The best location for round heaters is in the center of the biggest room in the heated zone. They will heat an entire house pretty well, even more so if the rooms have transoms that can be opened.
When you are ready to light the heater, turn the wick up to its highest position.
To use the electric glow igniter: as you turn/push the knob/handle that actuates the lighter, you should be able to look into the heater to see what you're doing. With some models, with the burner access door open, the burners heat diffuser will tilt up and you can see the igniter approaching the wick. On other models, look down from the top through the air slots in the "cabinet" in the area of the igniter. Don't jam the glow wire into the wick. Instead, gently and repeatedly bump the wick with it until the wick lights. If the heater doesn't light quickly, the wick needs cleaning or the fuel is bad.
When the wick has been ignited, grasp the burner diffuser handle [you may have to open the access door to get to it] and wiggle the diffuser left and right [CW and CCW] to insure it is settled into its guides. It will feel smooth and glide easily if it is seated. It will grind some or look out of kilter if it got hung up during lighting.
The heater will emit some odor on startup and shutdown. If it can be smelled any other time, it is not suitable for indoors.
Monitor the progress of the flame as the heater comes up to temperature. It should slowly appear above the burner diffuser and develop into a stable white flame with no odor. Once the flame has reached its apparent full height, reduce the wick height until a stable flame is held, with even distribution around the diffuser top. You should be able to adjust the heat output somewhat, but this varies from model to model.
Do not let the heater run completely out of fuel unless you are cleaning the wick. [See below] Monitor the fuel level and shut off and refuel the heater before it runs dry.
On most heaters, you shut it down by adjusting the wick all the way down into the wick adjuster. Check your manual. Don't shut the heater off by triggering the safety shutoff, unless it is an emergency or unless you really want to stink up your house.
The manual should contain a rating for how many cubic feet the room size must be for the heater you have. This is so the CO2 will not saturate the air in the room the heater is in. Observe this rating carefully. You can consider open doors to other parts of the house as additional cubic feet.
It is okay to run your kerosene heater overnight, if it has enough fuel to still be running when you wake up. The important thing is to not run it in an airtight environment. Most houses are drafty enough to be safe, but if you have a modern tightly sealed house, leave the top half of a window cracked open a bit.
When I got my first heater, I was worried about emissions. So, the first night I used it, I stayed up with it most of the night, carefully monitoring my condition and the color of my fingernails. For me, in that house, in that size room, there was no danger. You must use common sense and determine whether your situation is safe to run the heater all night.
Smell your heaters outflow. If the heater is trimmed properly you will not smell anything. Any whiff of unburned hydrocarbons means the heater is either not trimmed or it has a poor burner design. By doing this, you can guage how much you can throttle down your heater for low fuel consumption or if the heater is making too much heat on a higher setting.
Cleaning the wick: after 10 to 20 gallons of fuel has been burned, the wick may need cleaning. Over time, impurities in the fuel will deposit a char with the consistency of porous rock candy around the bottom of the wick. When the heater is running this char interferes with the flow of fuel through the wick causing uneven burning. It also makes it hard to start. To remove it you need to burn the heater completely dry. Don't attempt this without having a shop type vacuum around.
When you decide to clean the wick, hold off on refueling. Allow the heater to run until the flame suddenly falls off to a low burn. Monitor the heater, but really, you will smell it soon after this happens. Move the heater outside or to a room that you can close off from the rest of the house, and open a window in that room. Turn the wick up full, as high as it can go. It may take a few hours to fully burn dry. Don't become impatient and stop the process. When the heater has become room temperature, move it to a place where you can work on it. There will be chunky char fallout during cleaning. It WILL land on the floor.
Different heaters have different emergency shutoffs. Most of them close a shutter over the wick. Some just snatch the wick down into the cutoff position. Almost all will activate when you try to remove the upper cabinet of the heater. Follow your heater manuals instructions to safe the shutoff and removing the upper cabinet. Usually there are only three big thumb screws to remove for this.
On heaters that use a shutter, you will need to remove it to access the wick and burner. Usually, there are only three smaller thumbscrews for this.
When you can see the wick it's time to clean it. If it isn't fully up, adjust it until it is. Take the shop vac hose end and do a quick run around the top of the wick to remove ash. Lower the wick until it is flush with the top ledges of the burner. You will know what this means when you see it.
Next, take a flat bladed screwdriver [ I use two different sizes] and carefully chisel the char from the ledges that surround the wick. Try not to poke the wick with the screwdriver. Take your time. Do a rough job, then go back and detail it. Most of the char will end up on the floor and all over the heater, and in your front pockets. Once you have finished this part, use the shop vac to pick up the million little chinks of char, and also clean out the top of the burner. After you are done, lower the wick to its lowest position.
Reassemble the safety shutter [if your heater has one] and reinstall the cabinet.
Test the safety shutoff several times to insure proper operation. Re-seat the burner diffuser after testing the shutoff, and before fueling the heater.
If you forgot to lower the wick to the lowest position during cleaning, do it now.
Fuel the heater. Look at the clock. Wait 45 minutes. Light it up.
One last bit of advice: if you want to humidify the air, don't use a ultrasonic humidifier. Just trust me on this.
Great advice. I would add that investing in one or more carbon monoxide detectors is also a good idea.
Right now I run 2...a radiant as well as a convection and both from Wal Mart. In the coldest weather I ahve run as many as 4 but that was real overkill. I can easly heat my nearly hundred year old house to 65 degress with outside temps in the mid 30's. Colder than that I fire up the fireplace, or as last resort turn on the electric or gas heat.
We have had very little problem with smell or smoke. The heaters are well maintained and stored when not in use.
The glow from both the types of kero heaters is really enjoyable. Sometimes all we have running in the night are the heaters, a few candles of kero lamps and maybe a small fire in the fireplace. IMFamily'sO it makes for a really nice, comforting, homey feeling, especially on a cold, snowy night!
When I'm home alone I've even been known to cook on the convection heater.
It's true the cost of kero has gone up but so far it still beats anything else for us.
I'm still not a fan of the red dye thing though. Seems like since they started using it I've had much more maintenence. There are a few places nearby where I can get clear kero and I use that about half the time.
A typical monthly kero bill for this time of year is around $120...usually 30 bucks a week. The most we've had was last February when it ran around $350. Gas bills in the same weather run around $500/month with electrical running an additional $150 0r so. We definately save with kero altough some will say that's offset by the maintenence.wick cost. travel to get the kero. I've looked into installing a tank and having kero delivered but so far the return doesn't seem worth it.
prisoner6
I have a Dyna-Glo now along with Kero-World and Sanyo or Samsung. recently got rid of Comfort-Glo and Kero-Sun. Would like to get a Toyo Stove one of these days.
prisoner6
Over the years, I have tried to get a bit of a stash of gasoline. It was always frustrating that to buy plastic gas tanks new would end up costing as mush for the tank as it took to fill it up!
Simple Solution:
Garage sales
You can usually get a perfectly good 5 gal plastic tank for 1-2 dollars.
I still have a Kerosun Omni 85 bought in about 1981 or so and it still works very well. I use it in my shop if I need to heat things up to painting temps....
Disclaimer: Opinions posted on Free Republic are those of the individual posters and do not necessarily represent the opinion of Free Republic or its management. All materials posted herein are protected by copyright law and the exemption for fair use of copyrighted works.